Sometimes you need to know how to take your own headshot to send off for an article, speaking engagement, or something similar. You maybe haven’t gotten around to getting professional headshots done yet or the ones you do have are dreadfully dated.
Whatever reason it is, knowing how to take your own headshot is a valuable skill. Here are three tips to making your headshots more professional when you’re going at it DIY style.

Minimize your background
More often than not, you’ll need a photo of you against a plain, blank wall for a PR piece, magazine article, or other feature.
Don’t be afraid to rearrange the furniture in your home to access a blank wall. Remove photos or artwork from the walls. Don’t worry about holes in the wall right now, we’ll come back to those if needed.
If you’re not in a position to rearrange furniture, then make sure to minimize your background instead. Clear away unnecessary items out of the frame and tidy up.
Ideally, the room you photograph in will have a big window allowing plenty of natural light to come in.


Angle your body to face a window
Light is everything in photography. It will literally make or break a photograph.
I recommend photographing yourself when there is even or soft light. Try to schedule your shoot at the brightest time of the day when no direct sunlight is coming into the window.
When you’re setting yourself into the frame, angle your body slightly to face the window. This allows more light onto your body and face.
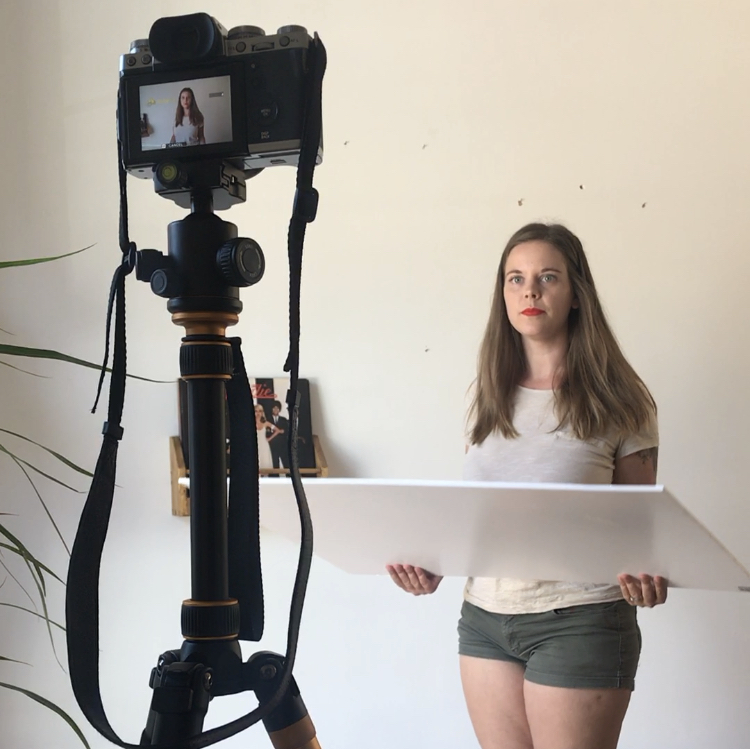
For extra effort, you can use a white poster board as a reflector to hold underneath your chin. This fills in some of the shadows.

Create space between yourself, your background, and your camera
It’s very tempting to stand right back against a wall or to lean against it. When you do this, you tend to create shadows behind you that aren’t very flattering.
Standing slightly away from a wall will mostly eliminate these shadows.
When you create space between yourself, your background, and your camera you are increasing the depth of field.


Bonus tip: remove distractions from your photo
Using an app like Lightroom Mobile (completely free to use and download–you just need an Adobe account), you can easily remove holes in walls from artwork and other distractions from your photo.
Add your photo into Lightroom Mobile, Select the “Healing” bandaid, and then draw over the offending holes. To remove larger items, like the record holder on the left of the image, you may have to go over with the healing brush several times.


BRILLIANT! thank you for sharing all these tips! Loved the one where you teach how to create a gif of yourself. I’ll be testing this during the weekend!
So glad you’re finding them useful, Nora. Can’t wait to see your gifs! x
This is fab Elle thanks for sharing x
No problem! Glad you found it helpful x